Pregnancy Postures
We have put together the adjustments for the pregnancy series. Some poses require small adjustments while others are substituted with more suitable poses, and some left out completely. All designed with the health of you and your baby in mind. Enjoy and do your best.
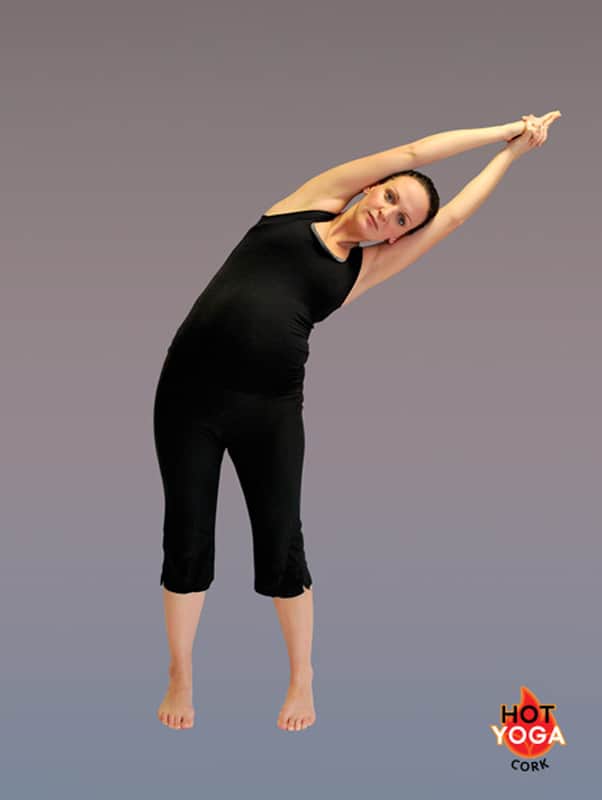
1. Standing Deep Breathing – Parayma
After three months, start to incorporate the pregnancy modifications into your Bikram practice.
The breathing stays the same, however some may find keeping the feet separated slightly provides more stability.
The breathing stays the same, however some may find keeping the feet separated slightly provides more stability.
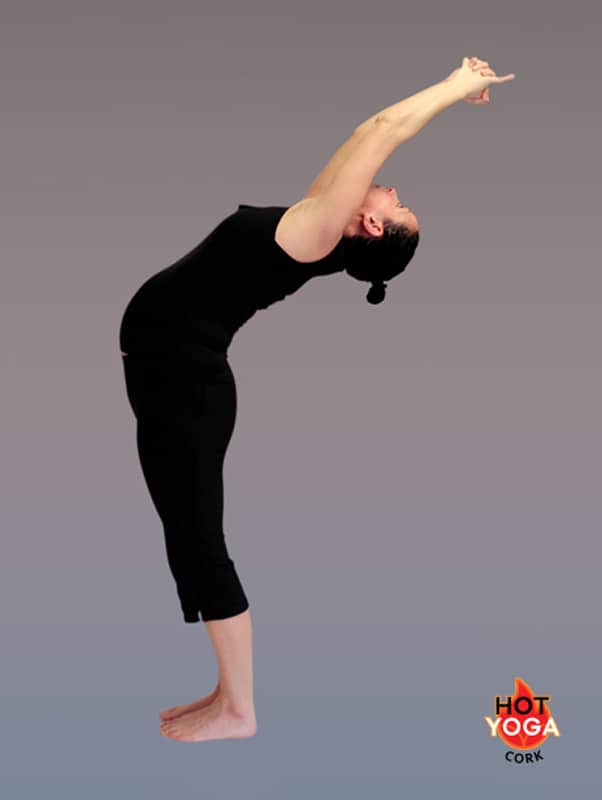
2. Half Moon Pose
Keep your feet separated hip width distance apart. Go only as far as you’re used to with the backbends.
With the forward bend, separate your feet as much as needed for the forward bends. Because you’ll have less abdominal support to protect the lower back, consider bending the knees on the way up and down.
With the forward bend, separate your feet as much as needed for the forward bends. Because you’ll have less abdominal support to protect the lower back, consider bending the knees on the way up and down.
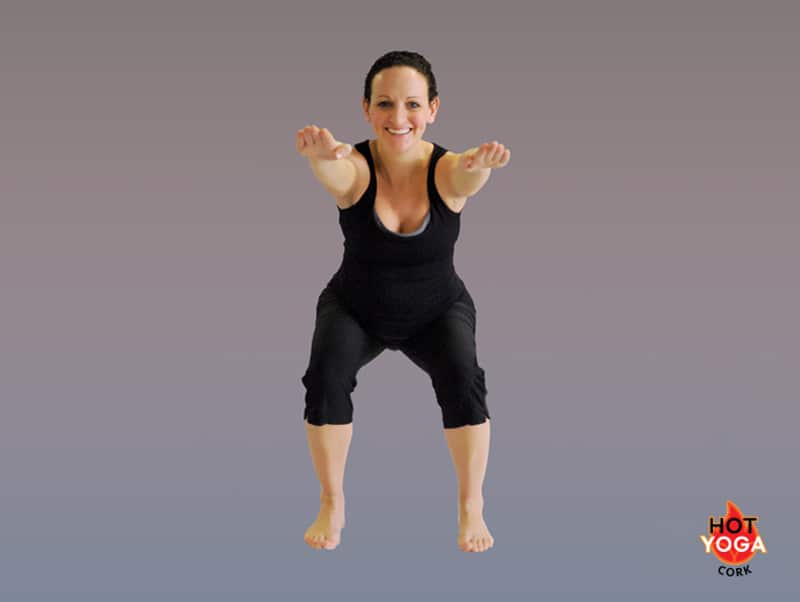
3. Awkward Part 1
Separate your feet as much as you need to make room for the belly, keeping parallel alignment. You may find that you can squat down much lower than before due to the relaxin affecting hip joints, but do not go lower than thighs parallel.
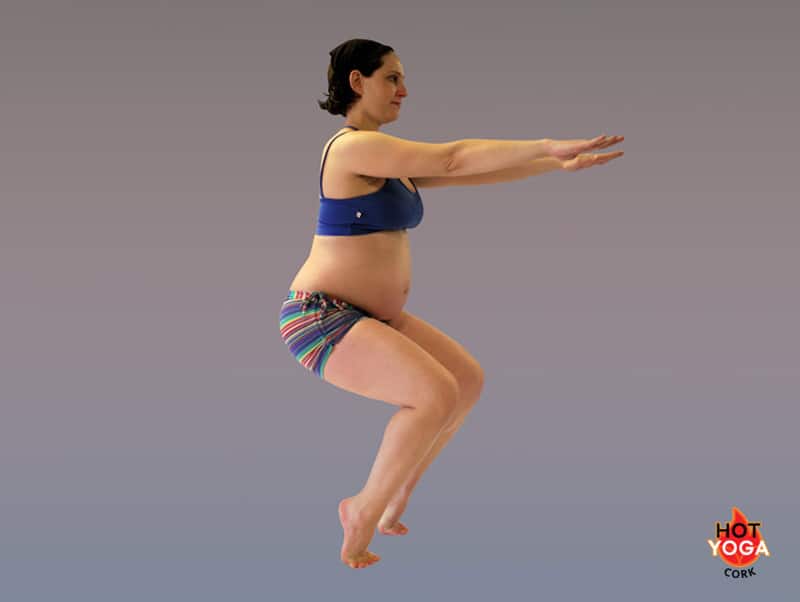
4. Awkward Part 2
Your balance may be tricky. Keep your heel hidden behind your toes to protect your ankle joints, which may have less support due to the relaxin. Strengthen up your arms since you’ll be using less abdominal strength. You may find that you cannot come down as low – no problem.
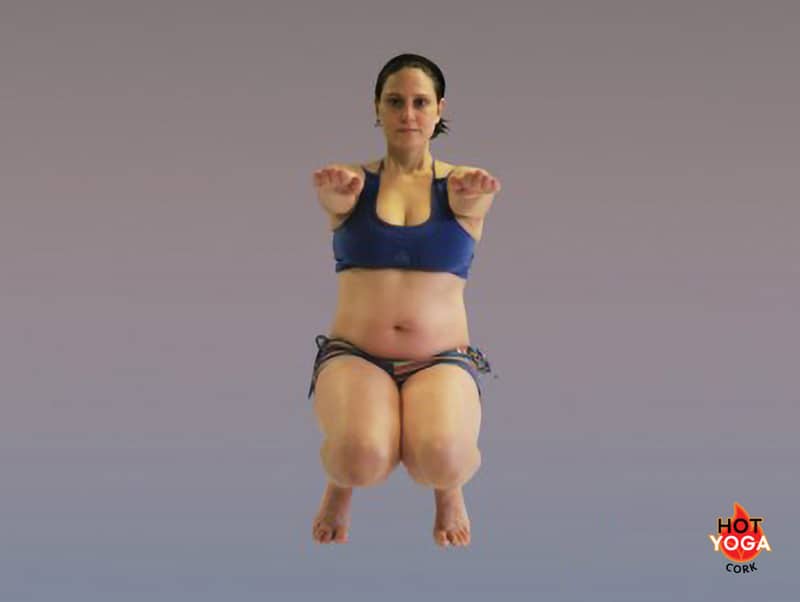
5. Awkward Part 3
Focus on your leg strength. You may need to separate your knees on the way down and up. Use your fingers tips on the floor for balance if needed.
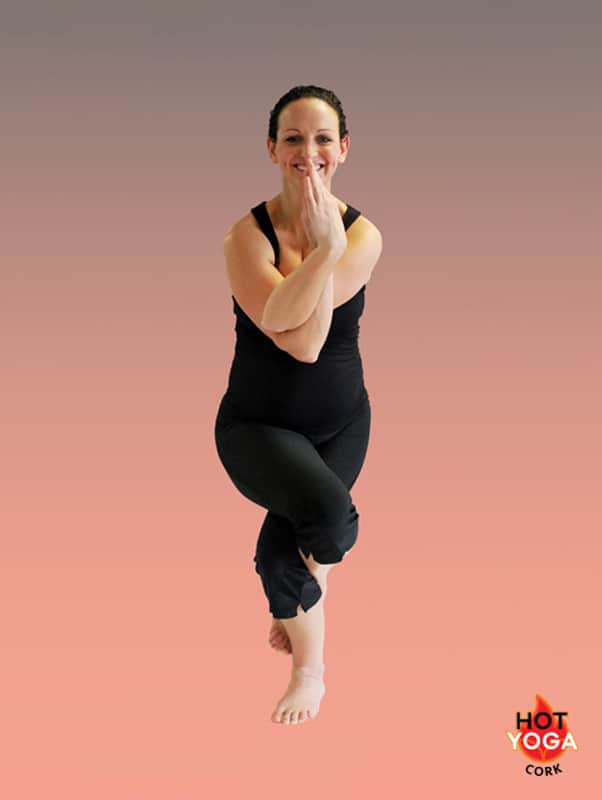
6. Eagle
Keep your feet separated hips width distance. Eventually, you may not be able to cross the legs, so keep focusing on the arms, shoulder and the upper body stretch. Build the leg and lower back strength from the squatting position.
7. Standing Head to Knee
We’ve moved into the Balancing Series, where using less abdominal strength may affect your balance. Keep focusing on alignment, with the toes directly in front of your heels.
Standing Head to Knee:This is an optional posture during your pregnancy. You can stand still or decide to lift your leg so the knee is line with the hip, without holding onto the foot with your hands. Make sure to keep your spine straight.
Standing Head to Knee:This is an optional posture during your pregnancy. You can stand still or decide to lift your leg so the knee is line with the hip, without holding onto the foot with your hands. Make sure to keep your spine straight.
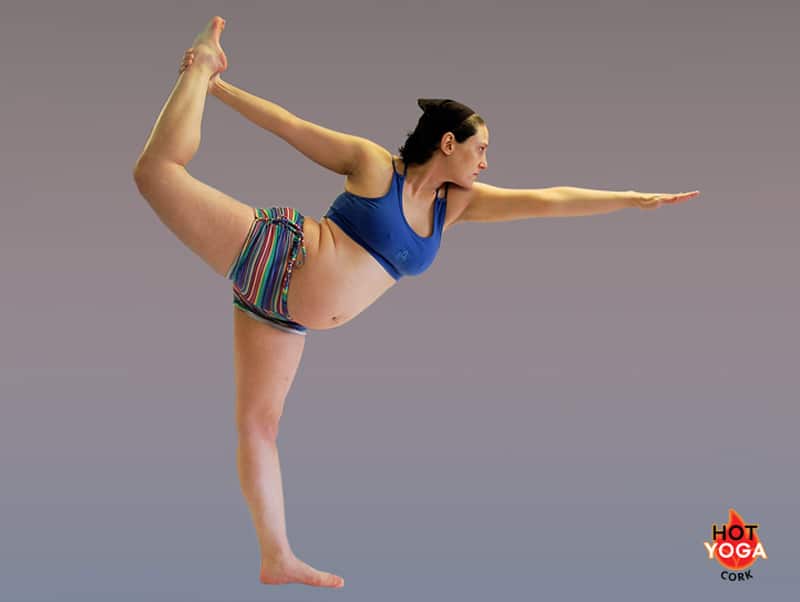
8. Standing Bow
Enjoy and keep your hips in one line! As you move further into your pregnancy, avoid lowering your upper body down too low in the pose.
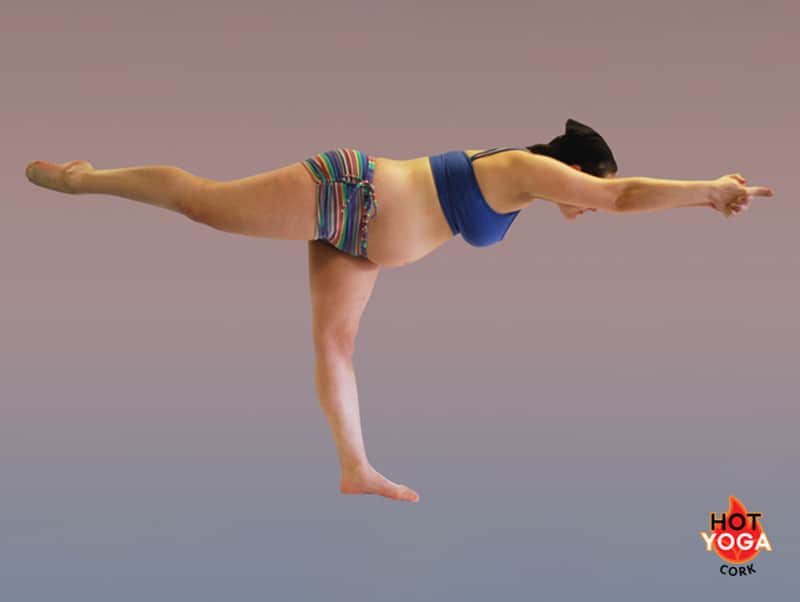
9. Balancing Stick
Accommodate for using less abs and having less balancing strength by moving into this pose slowly and with plenty of awareness
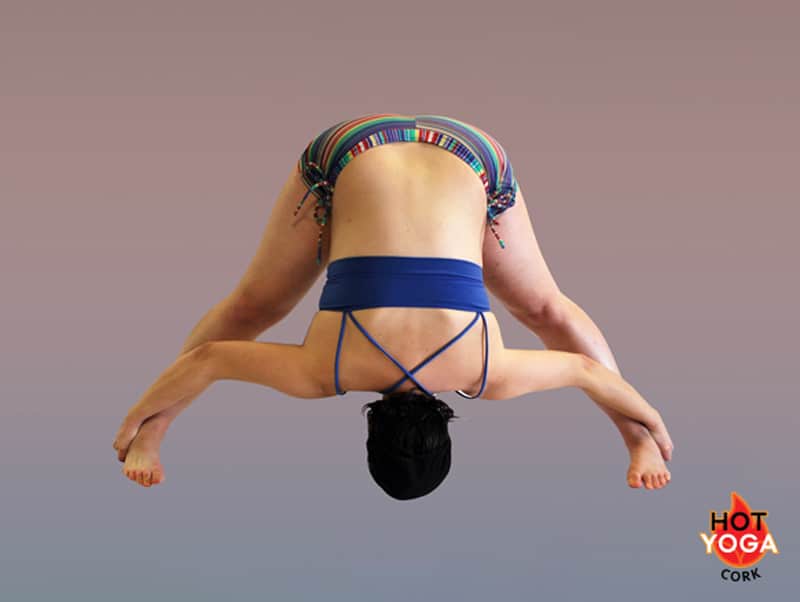
10. Standing Separate Leg Standing
Done with the balancing series, now it’s the Separate Leg Stretching Series.
Separate Leg Stretching: You may need to bend your knees, especially when lowering into the pose. It is safe to grab your heels, but eventually, you can place your hands on the floor in front of you, bend your elbows straight back, and lift your hips up for a nice stretch.
Separate Leg Stretching: You may need to bend your knees, especially when lowering into the pose. It is safe to grab your heels, but eventually, you can place your hands on the floor in front of you, bend your elbows straight back, and lift your hips up for a nice stretch.
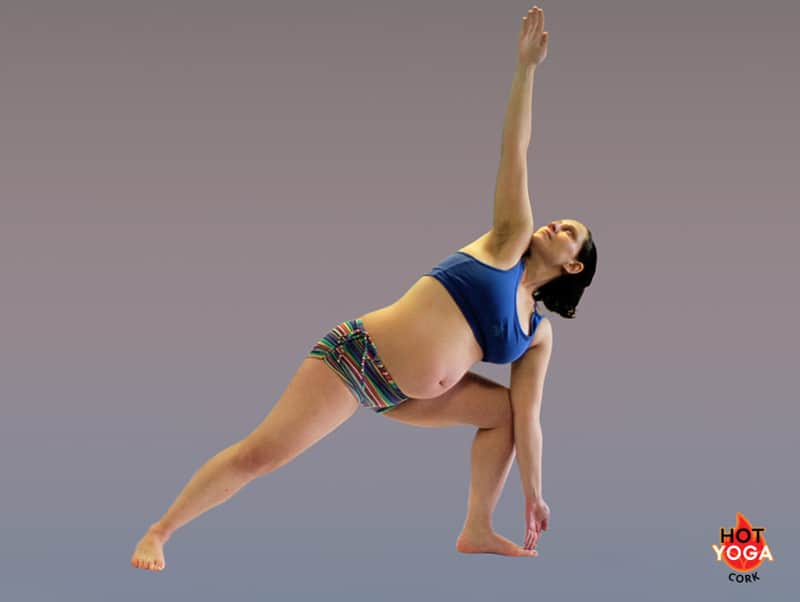
11. Triangle
Enjoy! You will probably find your hips are more open, making this posture actually easier. Remember not to sink into this flexibility. Eventually, you may not lower down as much.
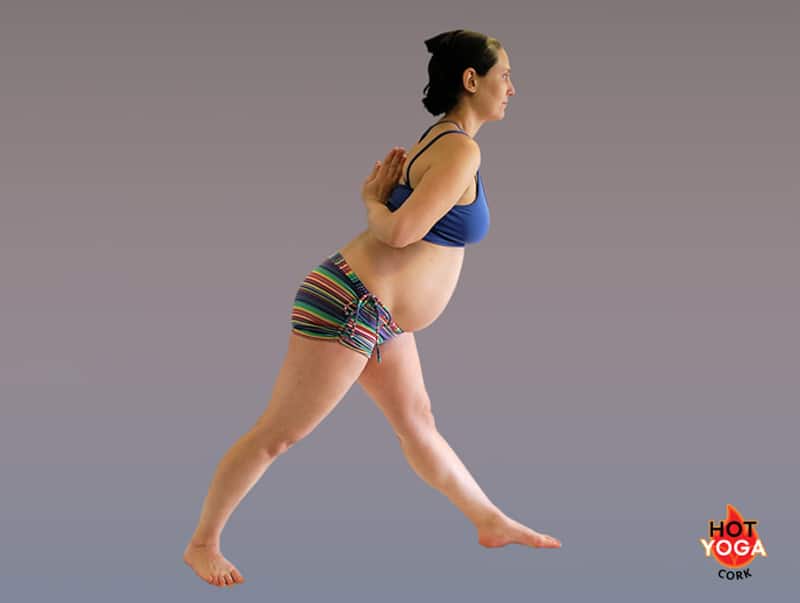
12. Standing Separate Leg
Keep your alignment with hips squared forward, and bring your hands behind your back in prayer position for a nice shoulder stretch.
Focus on keeping the spine straight and lengthening forward, rather than rounding down into a compression. This will leave space for the belly.
Focus on keeping your legs engaged and your hips in one line from the side.
Focus on keeping the spine straight and lengthening forward, rather than rounding down into a compression. This will leave space for the belly.
Focus on keeping your legs engaged and your hips in one line from the side.
13. Tree Pose
Stays the same. Find a nice opening for the hip joint and avoid sinking into your lower spine.
14. Toe Stand
Repeat Tree Pose while other students are in Toe Stand.
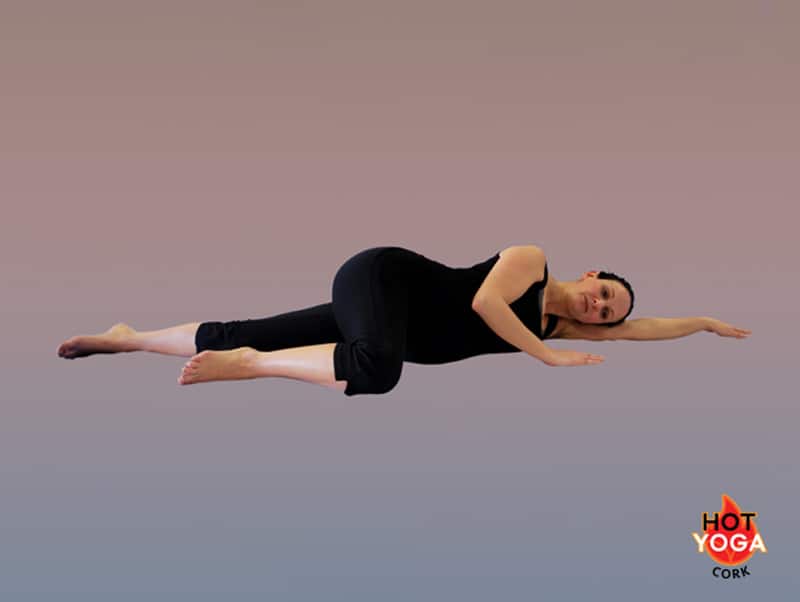
15. Savasana
Ahhhhh… lie comfortably on your left side, breath, relax.
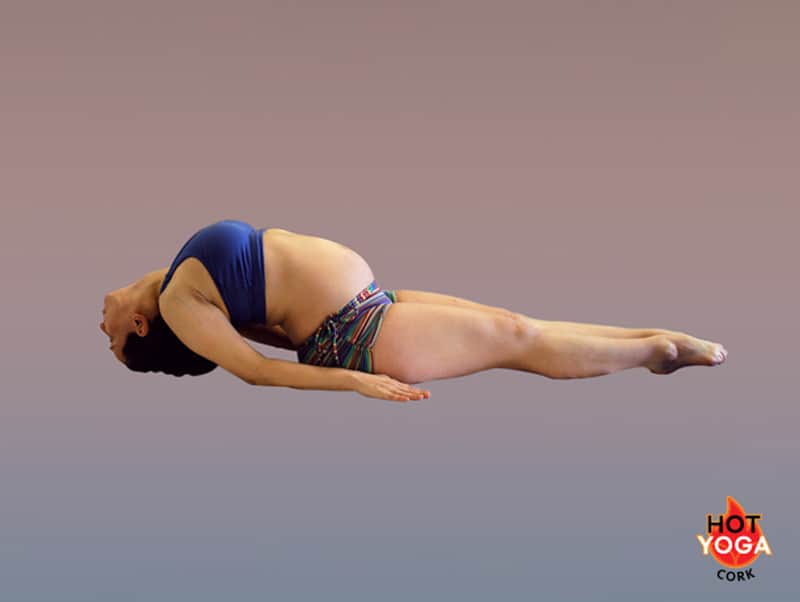
16. Cobra
To avoid lying on the belly during pregnancy, replace the postures in the spine strengthening series with these alternatives: Instead of Cobra pose, work in Fish pose.
Lie on your back and keep the arms stretched along side you, palms facing down. Squeeze your legs together, engage your buttocks, and press down into the forearms, palms and elbows, to arch your back up.Keep using your arm strength to arch the chest high enough to slide to the top of your head, looking to the front of the room.
More advanced versions of fish pose include bringing the hands together into prayer position at the chest, or working with the legs in lotus position
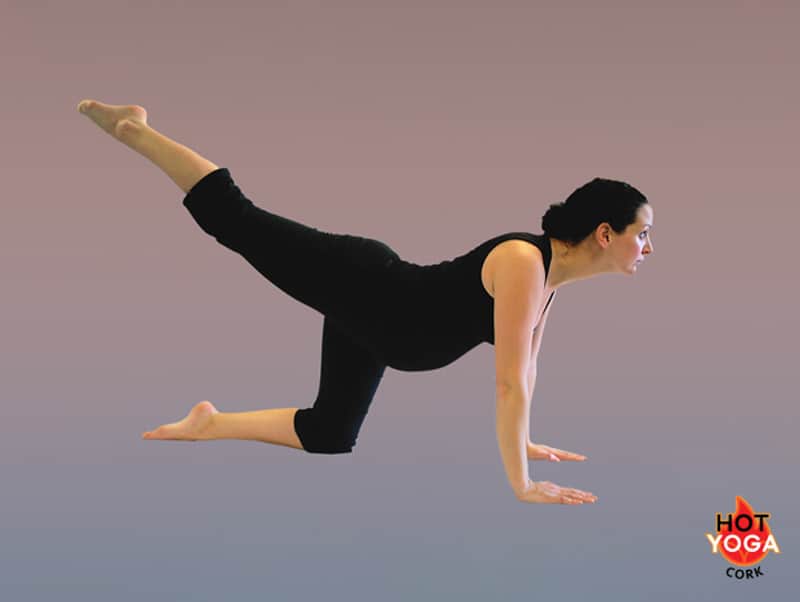
17. Locust
Instead of locust pose, work in a cat/cow pose.
Come to all fours, placing the hands underneath the shoulders, knees underneath the hips. Stretch the right leg straight back and lift the leg, keeping it parallel to the floor.
Repeat left side.
If you want more of a challenge, lift and stretch the opposite arm forward, keeping it inline with the shoulders.
Rest while other students are practicing both legs, or work in cat/cow posture.
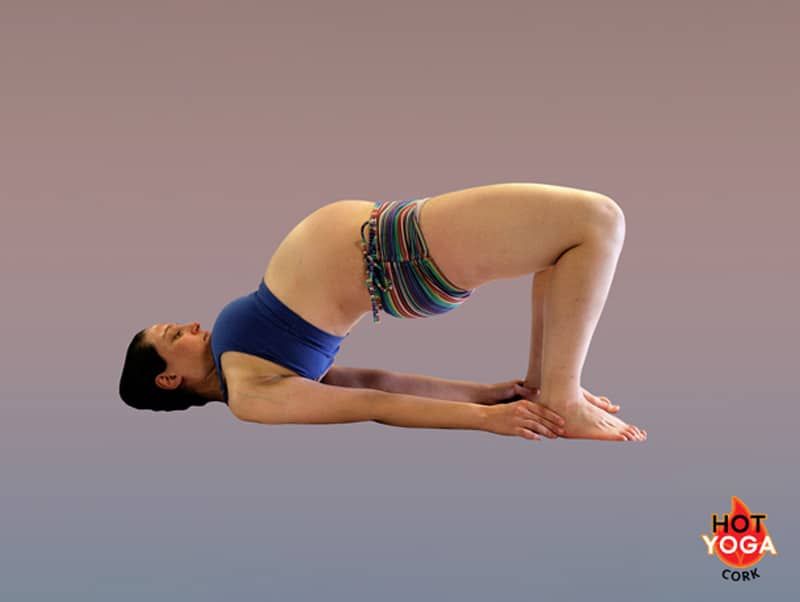
18. Full Locust
Work in Bridge pose here, rather than Full Locust pose.
Bend your knees bring heels to hips then grab your ankles from the outside, or palms flat on the floor. Lift hips towards the ceiling keeping head, neck and shoulders on the floor. Helps with elasticity of ribcage/lungs/breathing improves.
Bend your knees bring heels to hips then grab your ankles from the outside, or palms flat on the floor. Lift hips towards the ceiling keeping head, neck and shoulders on the floor. Helps with elasticity of ribcage/lungs/breathing improves.
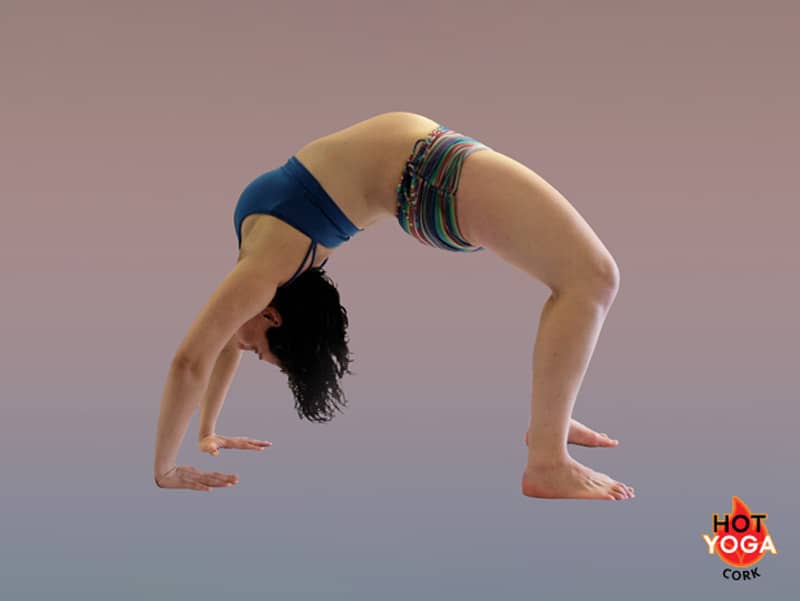
19. Danurasana – Full Bow
Instead of Danurasana, work in Wheel pose. Wheel pose is a more challenging pose than the previous Bridge pose and requires stength in the upper body and wrists. First set up for Bridge For bridge pose, then place the hands by the ears. Use the legs and arms to lift the hips and torso up and off the floor, creating a deep backward bend.
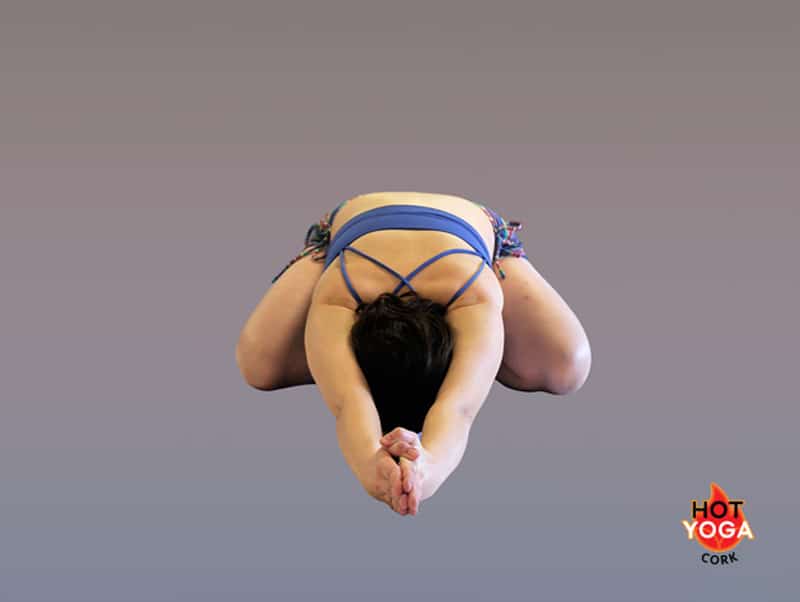
20. Half Tortoise
To avoid compressing the belly when lowering into the pose, open your knees as much needed to make room. You may feel like you are toppling forward once gravity takes over, so place your hands on the floor and walk the upper body forward if needed.
Help your self up with your arm strength rather than your abs.
Help your self up with your arm strength rather than your abs.
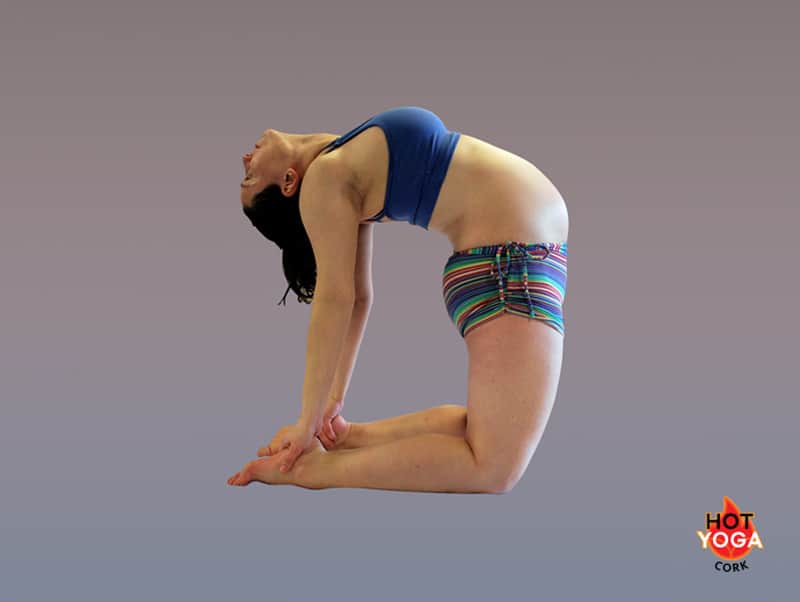
21. Camel
Be careful going in and out of this posture, always place your hands at the lower back for support. Place the hands on the heels if they reach easily without compressing the lower back.
22. Rabbit
To avoid compressing the abdomen, replace Rabbit pose with Cat / Cow Posture as above number 17. This posture will feel great and helps to move the baby into the ideal position.
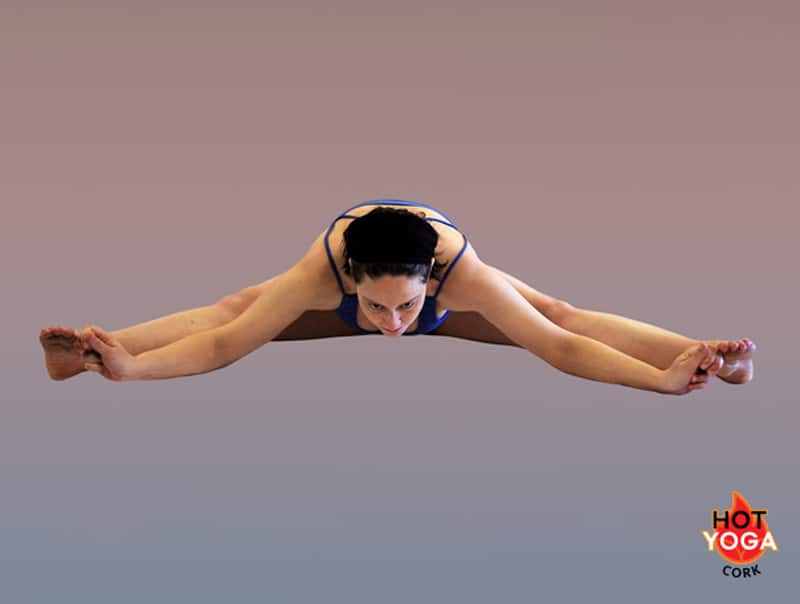
23. Leg Standing Passhimottonasana
Avoid compressing your belly onto your leg when working separate legs. If need be, avoid bending forward and simply lengthen the spine up as you flex your toes back to you, bringing the heel up off the floor.
Both legs: Separate the legs out to the side into wide angle stretch and lengthen the spine forward. Keep your hands on the floor to avoid a belly compression.
If you have the flexibility, you may work in full splits instead of keeping your legs together.
Both legs: Separate the legs out to the side into wide angle stretch and lengthen the spine forward. Keep your hands on the floor to avoid a belly compression.
If you have the flexibility, you may work in full splits instead of keeping your legs together.
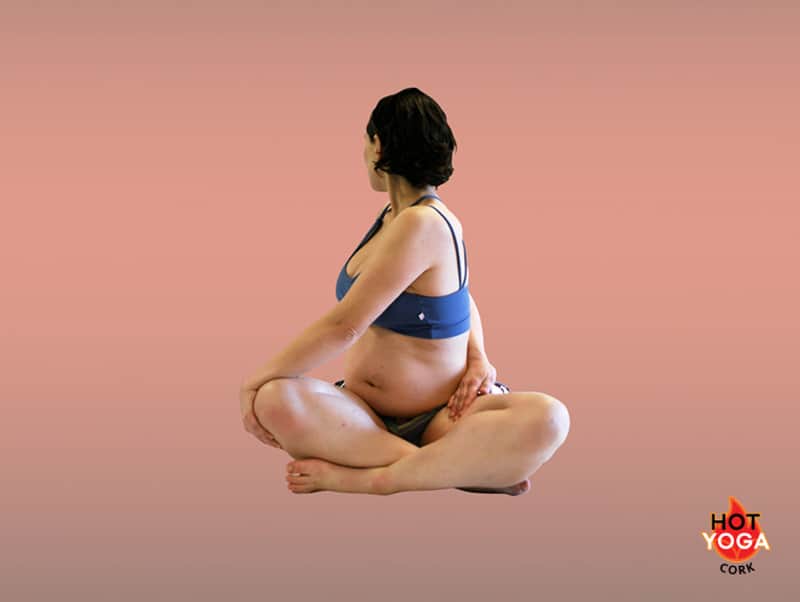
24. Spine Twist
Be careful with twisting, as you want to avoid compressing the abdomen. You may find it more comfortable work with your legs crossed. Sit up tall, bring the hand behind your back to keep supported.
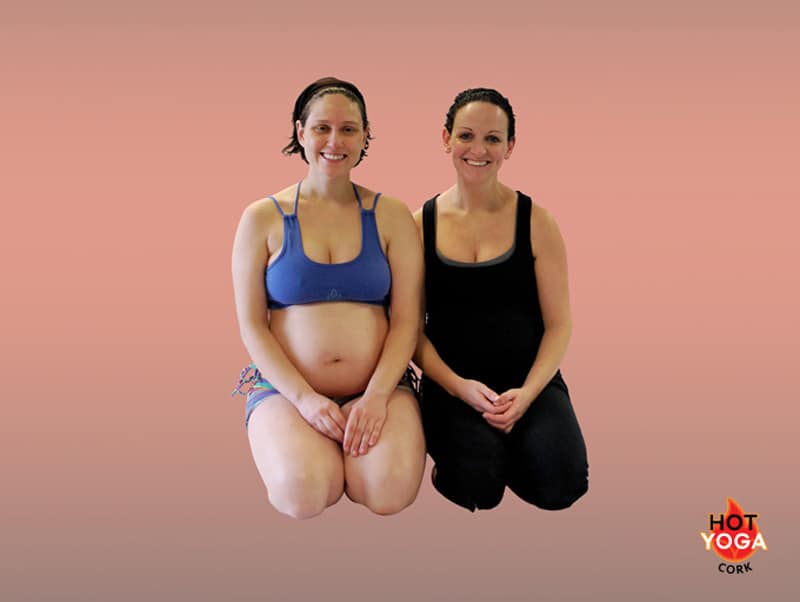
Dia & Aileen
Thank you to our wonderful Mums to be Dia and Aileen for being such great models. Showing us how yoga is done with grace and strength though out pregnancy. For more information on their experiences during their pregnancy and ihow Bikram yoga help Click.